How to set up Google Search Console domain verification in Hostgator
Overview
Introduction
Recently, I set up a WordPress blog using HostGator's shared hosting.
After writing the first post, I wanted to register the domain in Google Search Console (GSC) (former Google Web Master Tools). This tool provides you with very useful information on how Google's search engine sees your site. GSC shows you insights regarding the performance of your site, referral links, sitemap, and some other experimental capabilities.
For this tutorial, I will use the sample domain name sampleblog.blog.
Prerequisites
You will need an access to your HostGator cPanel. If you are not familiar with how to access it, please refer to the logging on to cPanel article.
My Stack
- HostGator Baby Croc account
- cPanel version 78.0 (build 47)
Step 1: Registering your domain in GSC
In early 2019, Google announced its domain properties capability, providing an easy way to verify ownership of a domain in the Google Search Console.
If this is the first domain you are registering, once you open the GSC, you will see the following screen:
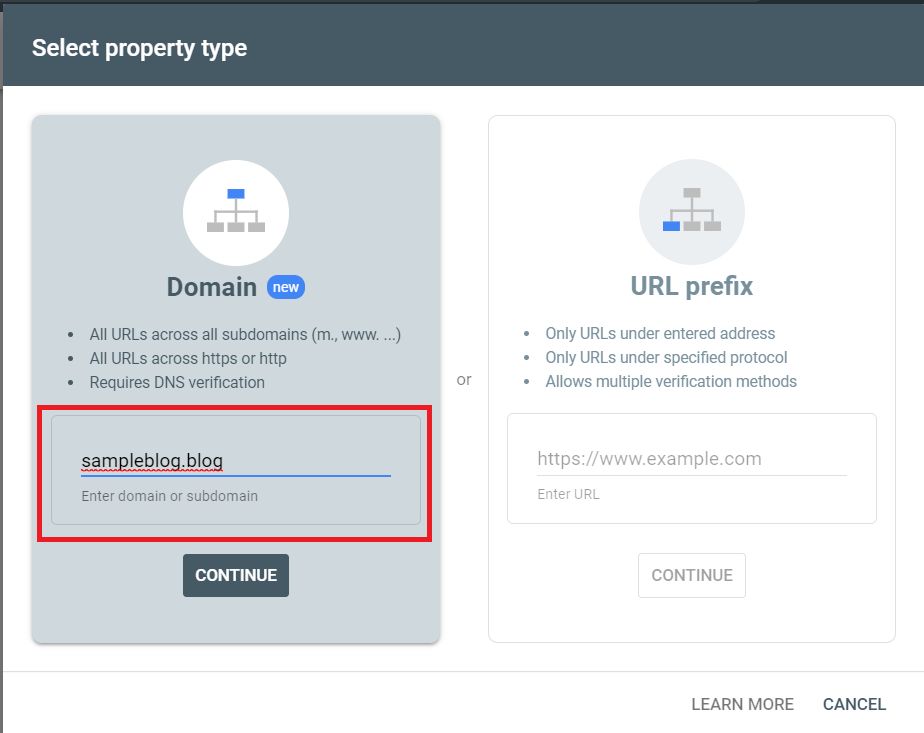
Domain property type in GSC
- Chose
Domainoption and type your domain namesampleblog.blog - Click on the
Continuebutton.
Step 2: Verifying the ownership via DNS record
As GSC requires domain ownership proof, in the following screen it requests adding a new TXT record with a specific code.
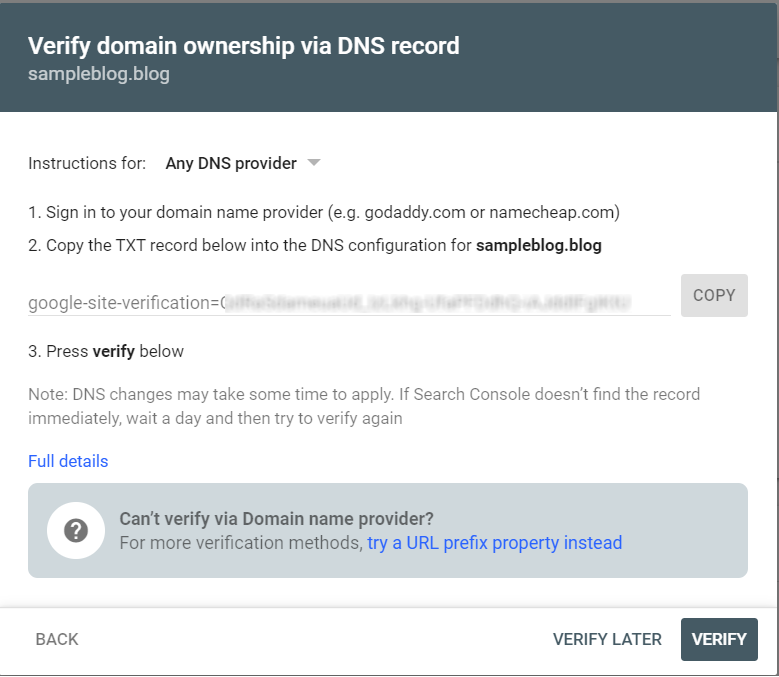
Verify domain ownership DNS
- In the
Instructions fordropdown, you can find domain providers like GoDaddy and Name.com, for which Google is able to write the DNS records automatically. Unfortunately, HostGator is not supported in the list, so we will have to write them manually. - Make sure
Any DNS Provideris selected. - Click on the
Copybutton to copy the text to your clipboard. Note this functionality is not fully supported in all browsers. In case the text is not copied, copy it manually using CTRL+C on Windows or Command+C on Mac.
Step 3: Setting the TXT record in HostGator
Opening 'Advanced Zone Editor'
- Open the cPanel main screen
- Locate the
DOMAINSgroup - Click on
Advanced Zone Editor
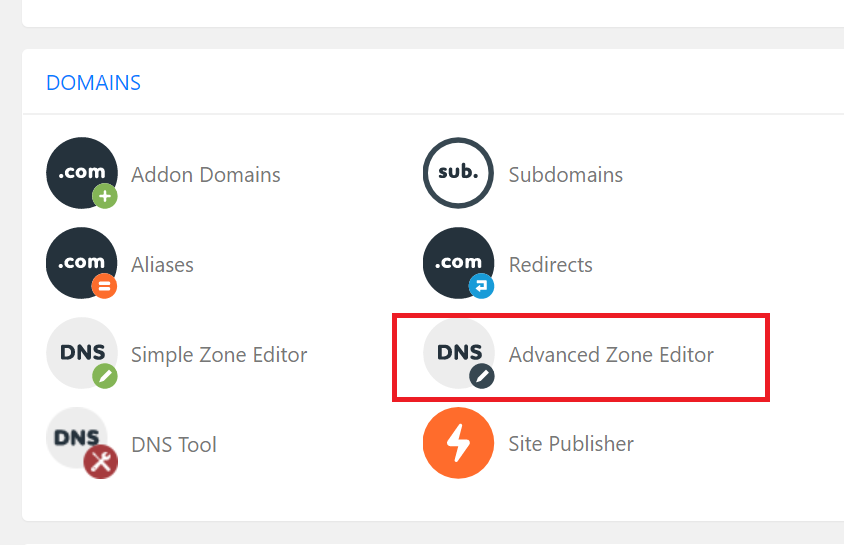
cPanel Advanced Zone Editor
Selecting the TXT record type
- In the following screen, locate the
Add Recordsection - From the
Typedropdown, selectTXT
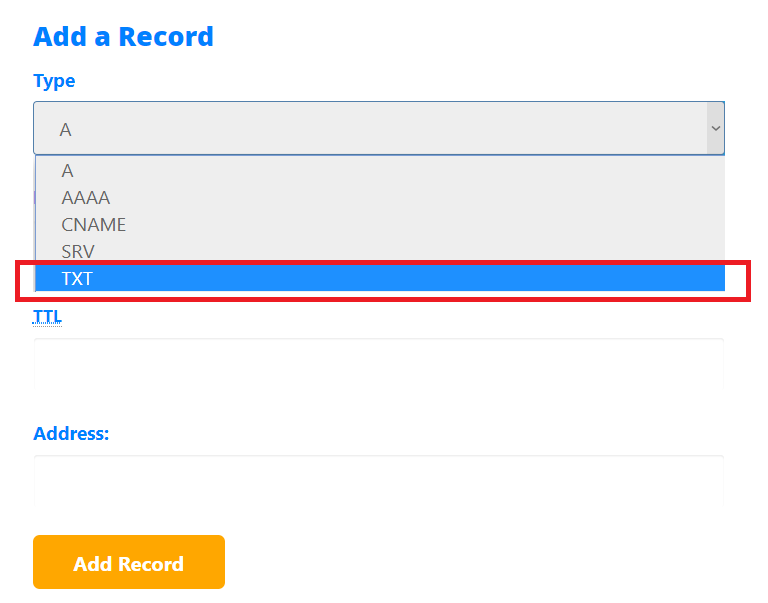
Choose TXT in the Type dropdown
Filling the record fields
- Leave the
Namefield blank, as HostGator will set it automatically to your domain name. - Set the TTL (Time to live) records to 14400 (meaning 4 hours). This tells the named server resolver how long in seconds to store the value in it's cache. Since we are not expected to change this value, 4 hours is reasonable.
- In the
TXT Datafield, paste the text you copied from Google Search Console. - Click on
Add Recordto finish. - Please note that it might take between a few seconds to a few hours until this change takes effect, so don't get discouraged if GSC is not able to immediately verify your site.
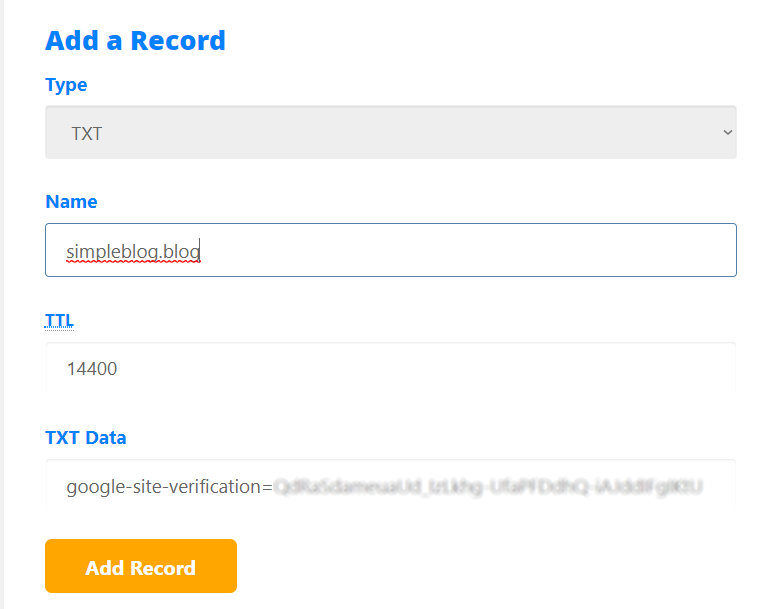
Fill TXT records for site verification
Step 4: Verifying in Google Search Console
Assuming you set the TXT record correctly, the only part left is to let Google verify the record.
- Go back to Google Search Console
- Click on the
Verifybutton - This process might take a few seconds. By the end of the process, you should see a message displaying that your domain is verified and added to Google Search Console.
Troubleshooting
- In case Google is not able to find the TXT records, it's recommended to wait a few minutes/hours until the DNS TXT record is fully updated.
Useful Resources
- Google announces domain properties